Strong names
provide
unique identities for assemblies and protect against tampering, but
they do not contain any information about the identity of the
assembly publisher. The .NET Framework supports the
Signcode scheme, which requires a publisher to
prove its identity to a trusted third-party authority and obtain a
software publisher's
certificate (SPC).
Strong names and Signcode are complimentary technologies, and both
can be applied to the same assembly. When you use Signcode, a digital
signature is created using the private key component of the
certificate and is embedded into the assembly along with the public
components of the SPC. The digital signature provides the link
between your SPC and the assembly you signed; other parties cannot
sign assemblies with your SPC unless they know the value of the
secret key, which is not included in the assembly.
You can use the Certificate Creation tool
(makecert.exe)
to create an X509 certificate for testing purposes
and then convert it to an SPC; genuine certificates are obtained from
companies such as Verisign. The following command creates a new X509
certificate; the Certificate Creation tool supports a number of
options to configure the test certificate, but we will accept the
defaults. The test
certificate is stored in a file named
TestCert.cer:
makecert -sv MyPrivateKey.pvk TestCert.cer
The -sv option stores the private key component of
the certificate in a file named
MyPrivateKey.pvk; you will need to use this key
later. You will be prompted to enter a password to protect the
private key file, as shown in Figure 1.
Convert the X509 certificate into an SPC with the Software Publisher
Certificate Test tool (Cert2spc.exe), as
follows:
cert2spc TestCert.cer TestSPC.spc
Now that you have an SPC, you can sign assemblies to identify
ourselves as the publishers. The following command uses
signcode.exe to embed our test SPC into our
example assembly:
signcode -spc TestSPC.spc -v MyPrivateKey.pvk SingleFileAssembly.dll
We need to specify the SPC and the file containing the private key in
order to sign the assembly. You will be prompted to enter the
password you created to protect the private key file. If you
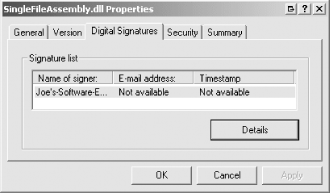
right-click the assembly in the Windows Explorer and select the
Properties menu item, you will see that a Digital Signatures tab is
available, as shown in Figure 2; this tab
describes our publisher's certificate, which is
created in the name of Joe's-Software-Emporium. A
real certificate would contain detailed information about you or your
company.
Using the Global Assembly Cache
If an assembly is
shared by several applications, you can install it into the Global
Assembly Cache (GAC), which is a machine-wide store of shared
assemblies. There are several reasons why you may wish to install an
assembly into the GAC:
Application configuration
-
The .NET Framework automatically looks for assemblies in the GAC, and
an application does not need to be configured to look for assemblies
in a known location, as is the case when an ordinary directory is
used to store shared assemblies.
File security
-
The physical location used by the GAC to store assembly files is
contained with the WINNT or Windows directory, which system
administrators typically protect with a higher level of Windows
security than that used for other directories. Installing an assembly
into the GAC requires administrator privileges, which reduces the
chances of tampering.
Administration
-
Installing a shared assembly into the GAC can simplify the
administration process, allowing configuration policies to be applied
to a single assembly instance, but affecting all of the applications
that depend on the assembly.
Side-by-side versioning
-
Multiple copies of assemblies with the same name but different
version information can be maintained in the global assembly cache;
see the .NET documentation for details.
|
Microsoft recommends that you install an assembly into the GAC only
when necessary. As a rule, you should locate assemblies alongside
other application components unless you seek one of the benefits
listed earlier.
|
|
Use the Global Assembly Cache tool
(gacutil.exe)
to manage the GAC. We will demonstrate how to install an assembly
into the GAC, inspect the contents of the GAC, and uninstall an
assembly, all of which are simple tasks.
|
Assemblies must have a strong name before they can be installed in
the GAC.
|
|
The following command installs our example single-file assembly
into the GAC:
gacutil /i SingleFilessembly.dll
The following command lists the contents of the
GAC, displaying information about every installed assembly:
gacutil /l
The list that this command produces is very long, but we can filter
the output by specifying the name of the assembly we are interested
in (note that we do not specify the file suffix once the assembly has
been installed into the GAC):
gacutil /l SingleFileAssembly
The output is below and provides a textual summary of the assembly
strong name. You can see the name of the assembly, the version
number, the culture setting, and the public key token :
Microsoft (R) .NET Global Assembly Cache Utility.  Version 1.1.4322.510
Copyright (C) Microsoft Corporation 1998-2002. All rights reserved.

The Global Assembly Cache contains the following assemblies:
        SingleFileAssembly, Version=2.1.0.0, Culture=neutral,
        PublicKeyToken=060fc0167cf4a028, Custom=null

The cache of ngen files contains the following entries:

Number of items = 1
Finally, uninstall our assembly from the GAC with the following
command:
gacutil /u SingleFileAssembly
The GAC is a
runtime service, meaning that the .NET Framework
consults the GAC only when executing an application. You must have a
local copy of the shared assemblies that your application depends on
at compile time, because the .NET language compilers will not locate
assemblies in the GAC.